
How To Make: Flower Card Invitation

Below provides some steps on how to make your own DIY paper flower card invitation. Please use caution when doing any DIY project to prevent injury or accidents. This is a general guide and it is up to the project maker and/or instructor to exercise safety measures when assembling or using any materials for the projects. Thank you!
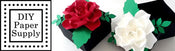
Suggested Materials:

The materials listed below are what was used for this tutorial. Choice of using the material ideas below depends on how you prefer to create the finished project. For example, glue dots or double sided adhesive squares might work best while others may want to use glue sticks or hot glue instead.
- 3" Size Flower Shape #3
- 2" Size Flower Shape #3
- 1" Size Flower Shape #3
- 2" Size Leaf Shape
- 1" Size Leaf Shape
- Let's Celebrate Curly Insert (size A1)
- Small Rhinestones
- Glue Stick
- Double Sided Adhesive Squares
- A1 Folded Card (3 1/2 x 4 7/8)
Basic Instructions With Pictures:
1) Assemble the large flower for the card front using 2- 3" , 2- 2" & 2- 1" size orange and yellow flowers. Stack alternating colors while gluing the colors on top of each other.


2) Attach card insert onto the inside of the card panel. Using the adhesive squares can help simplify the process by adding a couple rows to the back side of the insert. Flip it over and stick it down.


3) Assemble flowers for the inside of the card. With 4 - 1" size flowers make 2 by alternating colors and glue to each other.


4) With the large flower made during step 1, assemble onto front of the card along with the 2" leaf shapes. Use rhinestones if desired for additional embellishments.


5) On the inside of the card, use the 2 small flowers made in step 3 and assemble in the top corners along with 2 - 1" size leaf shapes. Use rhinestones if desired for additional embellishments.

6) The cute little flower card invitation should now be completed :)